Welcome to adobo-down-under!

Musings. Family. Food. Stories. Cooking. Recipes. Eating. A recipe journal. From simple Filipino dishes to challenging recipes and exciting gastronomical failures. This is for my girls to look back on for comfort, memories, laughs, love and lots of food!

Tuesday, November 29, 2011

Brioche bread and butter pudding


Puddings made with bread and butter are just the easiest things on the planet!  If there is one sweet dessert recipe that should be included in your repertoire, it should be the humble bread and butter pudding.    It is a simple baked dessert or morning/afternoon tea treat.  It is easy.  The ingredients are almost always, staples in your everyday pantry.  Easy, simple and yet quite impressive when served.  

This Brioche Bread and Butter Pudding was one of the 2 dessert tasks last week in Kitchen 11.  Supposedly simple, but Chef A had other plans.  He insisted that with the time we had in class, we could make brioche from scratch – Plan B.  And try I did.  First attempt failed. – dough thrown out.  Second attempt 50/50 – dough looked wet but we still went ahead and baked them.  The turn out?  Nice looking brioche loaf and muffins, but hard as rock.  Great for practicing tennis, as what Chef A jokingly said.  So after wasting about 5 egg yolks, it was time to go back to Plan A – use the dry store ready-to-use brioche and prep for dessert.  


This recipe is from the Prepare Cook and Serve Food for Service, TAFE NSI Booklet.
1 loaf brioche bread
7 eggs
450ml milk
450 ml cream
230g caster sugar
50g sultanas
1 tsp vanilla extract / essence
apricot jam, for spreading
butter, for spreading
icing sugar


 Preheat oven to 160*C.

Grease baking dish or ramekins (use either a medium-sized oval or rectangular dish or individual oval ramekins)  with butter. 

Slice the brioche bread thinly, retaining the crusts.
Spread with butter and jam.

Layer into a greased baking dish or ramekins.

Sprinkle sultanas and orange rind over the bread.

In a large bowl, with a balloon whisk, mix the eggs with the sugar.  Add the vanilla, then the milk and cream and gently mix together.

Pour the custard over the bread and ensure it is well soaked in prior to baking.

Bake at 160*C for 40 minutes and almost set in the centre.
Sprinkle with icing sugar and serve warm with Sauce Anglaise and a sprig of mint.


*Sauce anglaise is one of the greatest creation there is in the dessert world!  A tricky recipe learned in Kitchen 10 which shall be for a future post or you can have a look at David Lebovitz post).


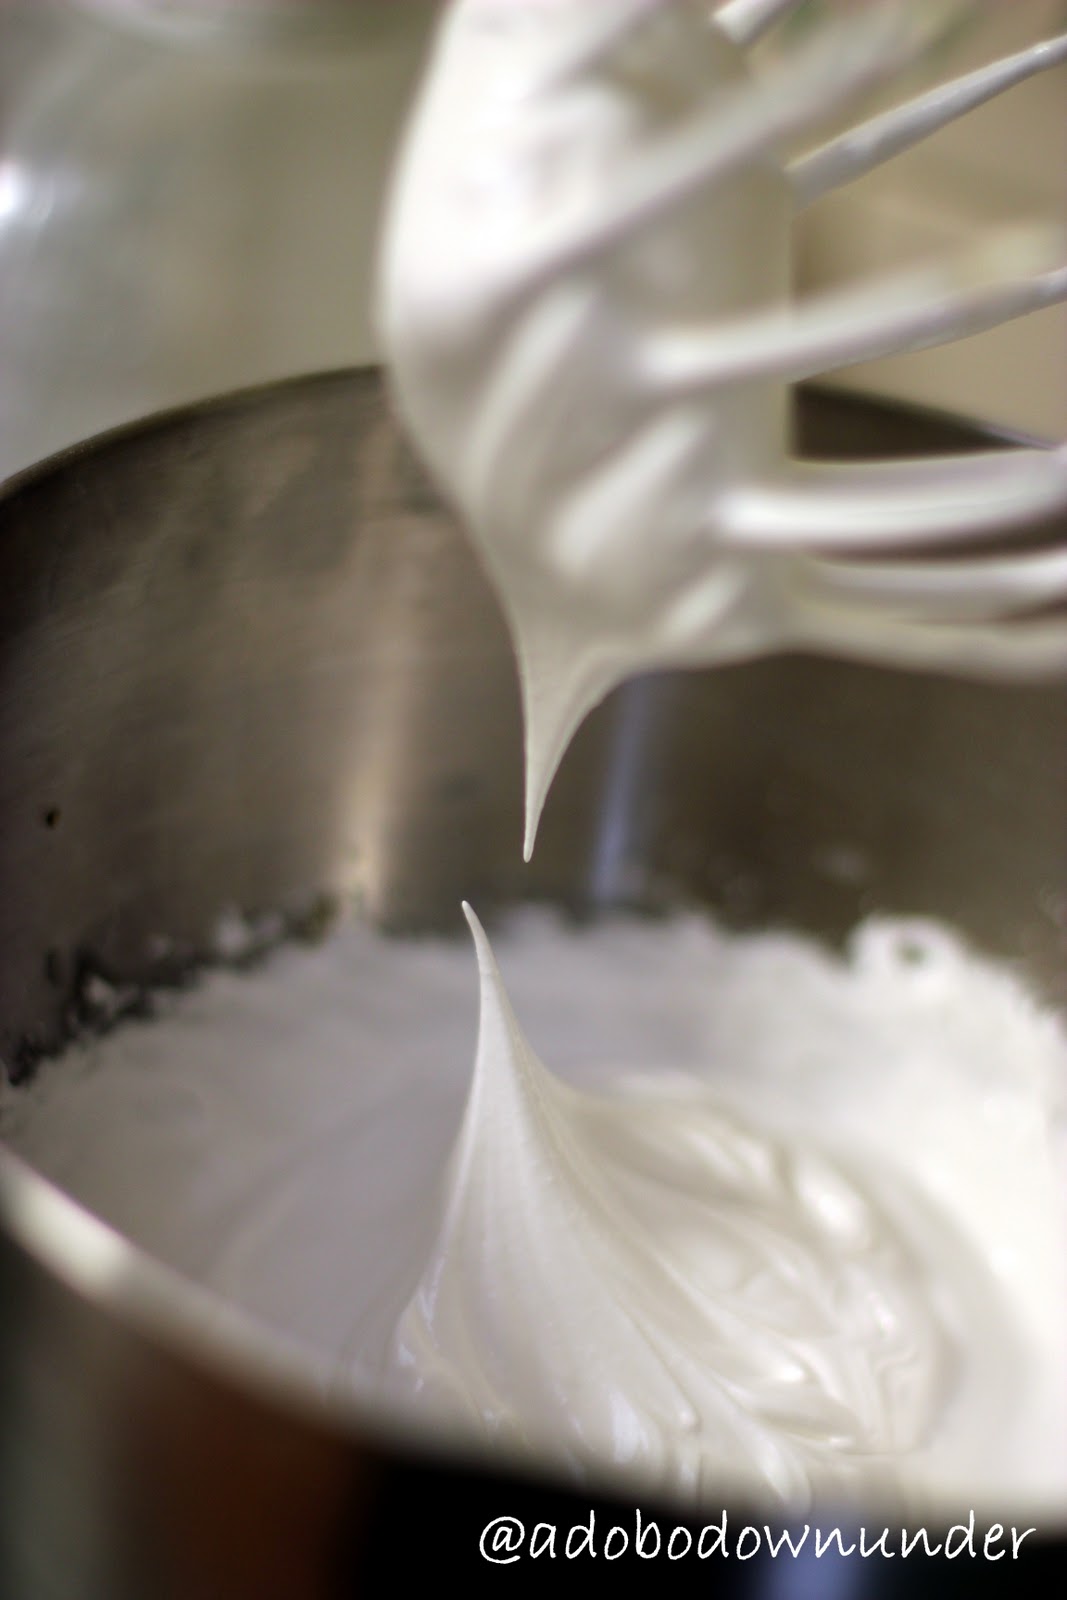
And to make up for all the egg yolks lost and egg whites gained, a corner of Kitchen 11 was concocting some other sweet dessert - a practice attempt at the classic Aussie Pavlova with dramatic results (see photo).  Which paved the way to the Cherry Pavlova Mess, which hopped its way into the first ever Australian Pavlova Bloghop which made its way into our tummies, which made everyone smiled and my heart melted. Amen.


Make some brioche bread and butter pudding today!  It's easy!  You don't even have to use brioche.  Any bread would do!  In fact, we've got so much mini croissant that might just end up being pudding later on in the week! 

Saturday, November 26, 2011

Cherry pavlova mess

Pavlova. Cream. Cherries. Mess. Heaven.

Six years in Sydney and playing around in the kitchen, cooking and baking and creating all kinds of culinary mess and never ever did this classic Australian dessert icon make its way from our oven to our table.  More of from Woolies shelves to our table. Convenience, right?   Yeah, but not quite.  A Filipino learning to be Australian should have tagged this as priority in her kitchen cooking projects.  It's one of those dishes/recipes tucked away somewhere with hope of some day giving it time and effort and love.  Some kind of unfinished business in the kitchen similar to Irvin's list from eatthelove.  I've separated yolks from whites many many many many times, but never got around to making pavlova!  But after meeting  and connecting with some of the amazing food bloggers now hosting a Pavlova Blog Hop - 84th and 3rd, The Hungry Australian, Delicieux, The Capers of the Kitchen Crusader and Dining with a Stud,  there's no more excuse not to try and make the classic Pavlova at home. 


Making Pavlova is not really difficult these days, thanks to the technology of hand-held beaters and stand mixers.  Beating egg-whites to the stiffest stage possible is easiest now with modern equipments as opposed to how it would have been back in 1935 when the supposed Hotel Esplanade chef Bert Sachse made this dish for the visiting Russian ballerina Anna Pavlova (Whether or not it was Sachse in Australia or a NZ chef who made the first pavlova is still debatable at this point, but that's a matter we can leave for the historians!)  Back to this classic Australian dessert....


This Pavlova recipe is adapted from the joy of baking

4 egg whites (used free-range XL eggs)
1 cup caster sugar
1/2 tsp vanilla extract
1 tsp white vinegar
1/2 tbsp corn flour


Pre heat the oven to 130* C.  Line a baking tray with parchment paper (you can also trace a 20cm cake tin on the parchment paper as guide to a perfect circle)

In a large bowl with a hand-held beater (or the bowl of the stand mixer), beat the egg whites until foamy or frothy

Foamy, frothy egg whites

Add the caster sugar, a tablespoon at at time and continue beating/whipping until the meringue (sugar and egg whites mixture) can form stiff peaks, and looks shiny. 

Stiff peaks


Stiff peaks!  Meringue! Love!

Add the vanilla extract and continue beating.
Tip the white vinegar over the meringue and sprinkle the corn flour, then using a spatula gently fold the meringue until the mixture comes together.

Spoon the meringue into the baking pan and spread evenly with a spatula.

 Bake in the preheated oven for 1 hour and 15 minutes, or until the pavlova has a pale cream colour.

Turn off heat and leave the oven door oven for another hour to let the pavlova rest and cool completely.

 
White!


Off-white!  -  Such a drama queen! Our Pavlova!

The trickiest part in making this dessert, like making meringue is the absolute perfection in technique, heat and timing.    But no matter how it turns out - pristine white and uncracked, or whimsically dramatic with a darker tinge and full of cracks,  top it with some cream and fruit or make a mess out of it... heaven!   


Pavlova mess with cream and nectarine poached in cherry syrup

 Pavlova topping 1:
1 cup thickened cream
1 tbsp icing sugar
1 cup fresh cherries - pitted


Pavlova topping 2:
1 cup thickened cream
1 tbsp icing sugar
2 nectarines, pitted and diced
1 tsp strawberry jam mixed with some sour cherry syrup

Whip the cream and sugar together until stiff and thick.
Spread on top of the pavlova and top with the fruits.


What's the greatest reward in making a pavlova?  The choice of topping is endless!  And you'll be rewarded with heaps of love and kisses, enough warmth to melt your heart but hopefully not your pavlova!


Thanks again to the ladies behind the first Australian Pavlova Blog Hop - without your endless reminders in twitter, this Filipina learning to be Australian would never have had the opportunity to create a big sweet mess in our little kitchen.  Sometimes, all we really need a little nudge and inspiration - to say "today is the day I did something for the first time".  One tick off my own kitchen's unfinished business!  And actually opened a lot more messes to create in our kitchen such as coffee meringue, which shall be for a future post.


Australian Pavlova Bloghop - Check out other Pavlova recipes below.  Clicking on an image will open the link with a new window.


Tuesday, November 22, 2011

Almond bread


As its approaching Christmas, there’s been an accumulation of lists on our refrigerator door. Evolving wish lists from the girls which they place there and add a few as wishes pop into their little heads.  More puffles and Club Penguin stuff mostly take up the space.  A few books and some art stuff.  B who is now 14 has announced that she doesn’t need a list this year and that she’s only wishing for 1 thing: an iPhone 4S.  Don't we all?!  I mean, how amazing is Siri, right?!  Ah. Christmas.  Silly season indeed.  The season that brings out one's inner child.


For what seems like ages, it has been my plan to make home-made goodies as Christmas presents to friends and families.  Despite the depleting inventory of my reused jar collection, Christmases have come and gone and no home-made goodies left our home as cute-gourmet presents.   Most of them have found solace and company in lollies and gummies, some cookies, left-over baking ingredients, sugar, flour and other staples.  They are serving their purpose for now.  And then finally, a light bulb lit in the form of Almond bread! 


A few weeks back, in one of the lessons in Kitchen 11, Chef A had one of us make some almond bread to accompany the dessert for the day .  He had this tried and tested recipe from his files which turned out nice and crispy almond breads/biscuits similar to the Italian biscotti.    I’ve been meaning to make them since.  When SMH featured them last month in Cuisine, that was it.  These are the easiest home made gifts for Christmas. 


I’ve tried them twice.  The first time did not turn out good – the bread was crumbly when I started to cut them with a serrated knife (bread knife) which can only mean I’ve over-baked it.  And so a second attempt was obviously in order.   This one turned out just right.   After 20 minutes in the oven, the bread is still soft, cooled and then kept in the fridge overnight.  Using a bread knife/serrated knife, the bread is cut thinly and then baked for another 5 minutes or until crisp.  


You can use store bought blanched almonds here, or you can buy almonds with the skin on.  Simply boil some water, then simmer the almonds gently for about 5 minutes.  Once a bit cool, you can squeeze the skins off the almonds and they will come off easily.


This recipe is adapted from Chef A's collection of tried and tested kitchen recipes which he quietly shared in Kitchen 11.

2 egg whites

1/2 tsp salt

120g caster sugar

120g plain flour

120g whole blanched almonds

1/2 tsp ground cinnamon

Prior to baking - pale brown colour

Preheat the oven to 180* C.

Grease and line a loaf baking pan or a disposable aluminum loaf tray.
Using a stand mixer or hand-held beater, beat egg whites with salt until frothy or foamy.

Slowly add the sugar (a tablespoon at a time) and continue beating to form a meringue. 

Using a spatula, gently fold in the flour, almonds and cinnamon.

Spoon the mixture into the tin and bake for 30-40 minutes at 180* C. (I've baked them for 20 minutes because we have a crazy oven that fluctuates its temperature as it breathes.  If you have a trust worthy oven, just follow the actual recipe of 30 minutes, then check every 5 minutes to make sure the bread has not burned.  The bread should be cooked but pale in colour.)

Cool  on a wire rack, then wrap in cling film or foil and place in the freezer for 1 hour  (or in the fridge overnight).

Slice thinly with a serrated knife and place on a baking tray.

Bake in 140*  C preheated oven until crisp or for 5 minutes.

Store in an airtight container.

Post baking - crisp and golden brown

The inspiration to make home-made Christmas presents came when I saw these mouth-watering divine caramel sauce from the Betty Croker website via Pinterest.   The one important thing to consider when making edible gifts is the shelf-life of the food.  For which the caramel sauce reviews and feedback was not as I had hoped for.  So, I'm betting my wooden spoons on these breads/biscuits!


How about you?  What are your Christmas gift giving plans this year?  Do you like making home-made edible presents?  Would you like it if you got one of these jars for Christmas?


Wednesday, November 16, 2011

Black and White Calamansi

The calamansi (pronoused ka-la-man-see)


The calamansi portrays an interesting aura in black and white.  They're actually unrecognizable.  Who would think these are calamansi (a Filipino lime variety similar to the cumquats).  They look more like some sort of gum balls.


Thank you Susan from The Well-Seasoned Cook for another exciting Black and White Wednesday!  Looking forward to this week's gallery!


PS - These calamansi (well, some of them) were used to make this sweet and tangy Calamansi (and lemon) cake from previous post.

Tuesday, November 15, 2011

Calamansi (and lemon) cake


We had a lovely weekend with the Oandasan’s at Ropes Crossing and then spent the entire Sunday spring cleaning for the quarterly Ryde Council Clean Up day.  Its amazing how much junk we hold on to. After a quarter, we still have stuff to get rid off like empty boxes from purchases (aka stand mixer, rice cooker, etc etc)!  Why in the world we keep those empty boxes puzzles me.  We keep them up for a few months, but then throw them away after a few. Ah. The human mind is indeed perplexing.

Calamansi (sometimes called Cumquats)

When D gave me these gorgeous green and yellow calamansi last week, I had no plans with them except for the occasional juice and some squeezed in soy sauce for a traditional dip with pork skewer bbq.  But when Trisha of Sugarlace tweeted about a calamansi cake, it was an “Aha why not!” moment!  I have had a recipe for lemon yoghurt cake which we usually make when lemons abound so the calamansi was a trial-and-error idea.  And while calamansi are too small to get some rind of these beauties, we still used some lemon rind and maximized on the calamansi juice for the flavour.

Calamansi is a Filipino indigenous lime variety, which is similar to the local cumquats.  Its seldom that these are available locally – either you get a small snack-pack size zip lock bag for $2 at Filipino shops, or you can get them by the kilo courtesy of friends like D.   Thank God for friends!


The recipe I used for the cake is the Lemon Yoghurt Cake posted awhile back with ingredients obviously tweaked and substituted and adapted the calamansi glaze/icing from Sugarlace’s post.


 1 and 3/4 cups sugar

2 eggs

3/4 cup oil (we used vegetable oil)

grated rind of 1 lemon

1/2 tsp salt
5 tsp calamansi juice

1 cup natural yoghurt

2 cups self-raising flour


In a bowl, mix rind, oil, eggs and sugar with a fork.

Add remaining ingredients (salt, calamansi juice, yoghurt and flour) and combine well.

Pour into a 20cm cake pan and bake at 180 degrees C for 30 minutes or until a skewer comes out clean. 

Cool on a wire rack for about 15 mintues or more.

Glaze/ice the cake when the cake is entirely cool.


Calamansi Glaze/Icing

1 cup icing sugar

3 tbsp calamansi juice

Mix with a whisk in a small bowl until smooth. 


Like all sweet and tangy combo cakes, it takes a mature palate to take in the taste.  The calamansi flavour actually kicks in each bite.  A very distinct flavour from lemon or lime.   The cake is moist, sweet and just a tad bit tangy.      A somewhat Filipino cake, dressed in Oz.


PS - This is my first attempt at actual food styling - used a pale blue fabric off cut.  After listening to Peter from Souvlaki for the Soul during the conference workshop and reading more of his brilliant tips from his latest post, I've been hunting around second hand shops looking for those odd vintage and classic pieces.  I just hope I'll be able to stop to catch up on some more cooking! It does get kind of addictive!

Saturday, November 12, 2011

Tartlet of caramelised onions with clotted cheese and roasted tomato


It has been an exciting week!  After the fabulous day, my tweeting ability has multiplied a thousand fold.  Well, maybe exaggerating a little bit. But still learning.  This was in my twitter timeline on Friday" #ff.  And embarrassing as it may be to admit it, but I had to consult good ol' friend Google.   I'm hopeless, but will keep up.  Technology is amazing!

Now going back to the kitchen, these entrees were from last week's Lesson 4 in Kitchen 10.  Was on the roster for entrees/appetizers.  And this kept me going from 3-7pm.  It did take that long, including resting the dough, blind baking the pastry, making the clotted cheese, roasting the tomatoes and cooking the caramelised onion.    What made it exciting was cheese making and making the short crust pastry - a first time for this Pinoy chef wannabe.   And while its seems overwhelming to look at the long list of ingredients and to do's, this can be done in a home kitchen on a weekend.  Who say's multi-tasking is only for the corporate environment?


ready for service

Enough of the chit chat!  Let's get to work!  First things first!  Savoury short pastry!

125ml water
250g unsalted butter
500g flour
1/4 tsp salt

The basics of short savoury pastry: 1-2-4: meaning one part water, two parts fat, four parts flour.

Cut the butter into small cubes, and rub the flour with the butter in a large bowl until it resembles fine crumbs.  (This is something that doesn't happen in a rush.  You need to rub rub rub the flour and butter for a good 15-20 minutes to get good results.  You know you're done rubbing when there are no more big lumps of butter, instead of you have a bowl of grainy flour).

Add the salt and the water and mix together using your hands.  You will create a soft dough.  
Do not overwork.  

Wrap in cling plastic and rest for 30 minutes in the refrigerator.

After resting, grease the tart pans with butter or oil spray. Line the pastry onto the pan, cutting edges with a kitchen scissor then press firmly.

the dough pressed onto 8cm disposable tins

 Cut out round or square baking paper and lay these onto the pastry.  Use baking beads or beans and pour these onto the pans.  Bake blind for 15-20 minutes in a 200*C preheated oven.


the pastry ready to be baked blind using mixed beans

The pastry is ready when they are golden and are easily lifted off the pan/molds.

Set aside to cool.


Its time to make the fillings!  Roasted tomatoes first!
 
5 large Roma tomatoes
1/4 bunch thyme
salt and pepper

Cut the tomatoes into quarter.  Season with salt and pepper and chopped thyme.  

Place on a baking sheet or roasting tray and slow roast at 140*C for approximately 40 minutes.


And while the tomatoes are roasting in the oven, prepare the caramelized onions.

200g (about 2 medium sized) Spanish onion, sliced
1 garlic clove, minced
20g brown sugar
1/4 bunch basil
50ml olive oil
20ml balsamic vinegar


In a medium sized pan, sweat the onions with garlic and olive oil.

When cooked (onions have softened), add the sugar and caramelise, add vinegar and seasoning.   

Set aside in a plate or bowl and cool.


To serve: arrange the caramelised onions and roasted tomato in the pastry.  Serve topped with clotted cheese and some basil leaves. Or if you're not making the cheese, fresh ricotta or some crumbled feta would be just as great.


Have a great weekend everyone!  And while we're still coasting through the middle of November, best to get on with some Christmas shopping! 

Thursday, November 10, 2011

Cheese pimiento spread


I love books.  And I love cookbooks more. I don’t have a massive collection but I have a few “go to” books on the shelves in our home.    From basic pancake recipes to sweet indulgences such as David’s chocolate  orbit cake.  When possible, I’d like to buy the hard bound editions and usually bought online, the anticipation over their arrival envelopes a certain anxiety in me that I’d be checking the courier’s online tracking every few minutes just to make sure, imagining the driver pulling up the drive way and carrying my precious hard bound cookbooks.  Exactly how I feel when my girls are not within my sight – out at a party or a playdate with mates.  There’s that maternal bond that exists between my cookbooks and me.   They can have ganache stains on some of them, one with blueberry syrup stains and some bits of flour clinging from the sides but that’s ok.   The messier they get, the more love they feel.

A recent article by Julia Moskin in the NY Times asked the inevitable question.  Are cookbooks obsolete?   The article cited some great cooking apps with features like interactive voice prompts, clear and close up photos (some you can actually zoom in and out to see the actual texture and size), built in timers, and all other glorious and convenient benefits.  Such as the ability to travel with the user.  Ms Moskin interviewd Bob Huntley who developed CulinApp which was released this year with Baking with Dorie as its first product.  Although this is not the first of its kind out there.  It poses this question whether cookbooks are actually becoming obsolete.  The app looks amazing, and it beats the price of having to buy the book which could be worth 5 times more.  Why, it even has video’s of actual steps!   It seems to keep to its tag line “We bring the Chef to your kitchen”.  Other than this, heaps of other cooking apps surround the tech savvy home cook.  From magazines apps  to cookbooks to videos.  Julia Moskin mentioned in her article that by June next year, students at the Culinary Institute of America in NY will also be issued tablets loaded with the school’s new app.  Certainly beats lugging all those heavy bound text cookbooks around. 


Now lets segue to the real kitchen and have a look at what's new today!  Its cheese pimiento spread!   And its easy to make!   A food processor or in a large bowl using a rubber spatula are the 2 ways to make this spread.  Its important that the butter is soft and in room temperature to mix all the ingredients together.


250g unsalted butter, softened
500g tasty cheese
3 mediums sized capsicum, diced finely
salt & pepper to season
dash of paprika for added colour

Mix all the ingredients together in a large bowl.  Season with salt and pepper and a pinch of paprika.  You may add some fresh chillies with the capsicum for the added hit.

Transfer into reusable jars or containers, and keep in fridge.  


How long it will keep for?  I can only guess it should keep for 2 weeks in the fridge. 


Now this recipe is not from any cookbook or an online page.  I grew up with a cheese pimiento spread in our pantry under the Kraft brand.   But ages ago, my sister in law made these from scratch and it was just as how you would want a cheese pimiento spread to be.  Cheesy and has that sweet and the right kind of spice from the capsicums.  This batch made 2 jars the size of a 250g-jam.  Too much for the mature palate in this home, so I'll be sharing the love and bringing a jar to my sis and big brother's place. 


Now, are apps making cookbooks obsolete?  Yeah. Tablets may be the next best thing that can happen to the culinary arena.   But to me, nothing beats the feel and smell of new books.  The crisp white pages when they’re still new and then become tinged with ingredients and use through the years.  I like cookbooks because I can bring it to a book signing when my favourite Chef is at the local book store or has visited from overseas for a food festival.  I like books because no matter how stained they may be, from use and time, I know that I can pass them on to my girls when they need some cooking inspiration in the future.  But then again.  That’s just me.  I’m just a sentimental fool.    And yeah.  I have just recently learned what a hashtag is and still learning how to tweet.  Does that make me un-techno savvy?    


How about you?  Do you have a cookbook collection?  Would you trade in a cookbook for an app?


PS - Dorie Greenspan is one of my favourite chefs and I have in fact ordered her book Baking from My Home to Yours just recently.   This post is an objective opinion of apps in general. 

Wednesday, November 09, 2011

Black and White Wednesday - Week 18


Forks!


Another week of Black and White Wednesday hosted by Susan from The Well Seasoned Cook!  Every week is just as exciting as the week before!   Can't wait to have a look at this week's gallery!


These were props used by Peter from Souvlaki for the Soul during the Food Styling Workshop at the Eat Drink Blog conference over the weekend.  They look lovely.  Mismatched.  Shiny. They all have individual characters.  

Tuesday, November 08, 2011

Clotted cheese

hanging by a thread :)


I first read about home made queso blanco from a former office colleague S and promised to try and make the same at home.  And then just a few weeks back, NQN posted a recipe for home made ricotta cheese.  Both bookmarked and tucked away for some future kitchen episodes.  
Cheese is a universal and versatile ingredient – it goes with sweets and savoury dishes.  Great as entrée’s, in soups, topped or mixed into meat and seafood dishes, in cakes and desserts and even in ice cream!  But it goes without saying that cheese making, or making cheese from scratch is an art.  Like artisan bread making, it entails dedication and passion and skill.   So it was a surprise when clotted cheese was in the menu for entrée for Lesson 4 on Prepare, Cook and Serve Food in Kitchen 11 (we're moving kitchens this term, but Kitchen 10 is close to my heart)  this week   It’s a simple recipe.  2 ingredients + 3+ hours waiting time.  Milk and vinegar together, curdles and becomes cheese!  Don’t we all know that already?! Yeah, right.  Of course.  Its not rocket science, is it?


To make this simple clotted cheese:

2 litres milk
200ml white wine vinegar


Heat the milk to a tepid 35°C.  Add the vinegar and let it sit for 20 seconds.  Stir slowly with a spatula and let the milk curdle.


Using a muslin cloth placed over a large bowl, pour the milk and let it drain.  Knot the ends of the muslin cloth and using kitchen twine, tie it on a wooden spoon handle.  Suspend over a deep dish or tray and let the liquid drain from the cheese for 3 hours or more.  The cheese is ready when it is firm.

* You can drain for more than 3 hours for a firmer cheese.


The milk + vinegar mixture = cheese, after 3 hours.  Slightly firm with that texture from the muslin cloth.


The result was a slightly sour cheese that was almost ricotta like.  As the basic cheese was not seasoned as per the recipe, Chef just tossed a few herbs (finely chopped chervil and thyme), salt and pepper, and it completely changed the cheese.  We topped it over the day’s entrée of Caramelised Onion Tartlets - which shall be for another post.


Crumbled clotted cheese seasoned with salt and pepper and chopped herbs

Would I make my own cheese at home?  Probably when it calls for impressing someone - like when my in-laws from overseas fly for a visit?    Otherwise, I'm a simple cheese kinda gal.  I love provolone cheese in my pasta, some gruyere with crackers and chutney, some ricotta and feta for that attempt with the Greek spanakopita  and gorgonzola for those once in a blue moon cravings.  I’m not a cheese aficionado, but I do love them when they come in simple form, i.e. a block of tasty cheese.  But that's just me.  There's still hope of course, before that "under the Tuscan sun" retirement.  If that's ever going to happen.   Meanwhile, why don't you try making this at home?  It's easy and afterward, you can add home made cheese to your list of culinary repertoire.

Caramelised onion tartlet with clotted cheese and roasted tomatoes

Monday, November 07, 2011

Eat Drink Blog 2011 - Fabulous Day!


Pre EDB2011 registration, I had no clue what a hashtag was, had about 18 tweets since my account was opened in 2008 and was invisibly coasting in the food blogging world, quietly following some and replicating recipes as I found them.  But it was sheer stroke of luck.  One moment the registration was closed and what followed was a series of fortunate events.   When the final conference details and list of participants came out prior to the date,  the tweets started coming and coming and coming.  


On the way to Mascot was unlike any other.  My nerves were already getting the better of me   and navigator thought to play tricks with turns and shifts in routes changing in the blink of an eye.  But this was nothing compared to what I felt when the doors of the Electrolux Demonstration Centre along O'Riordan Road opened its doors.  There was so much buzz and excitement that was just contagious!  To be around so many amazing foodies is as intimidating as it is overwhelmingly exciting.  


Chef  Nonie Dwyer with a lamb butchery masterclass


Peter from Souvlaki for the Soul at the Food Styling workshop


Chef Lars Svenson from Kingsley Crab and Steakhouse prepared the Singaporean Chilli Mud Crab


Chef Matthew Brock with a masterclass on Sourdough Bread making


The conference was packed full of useful and important information for a food blogger - from legal issues to ethics, from food styling and photography to meat, crab and bread masterclasses, from SEO to personal experiences from successful bloggers.  Valerie Khoo from the Sydney Writer's Centre shared 7 tips to create more flair in blog posts and Simon Marnie confirmed his support to the food blogging community.  It was great to finally come face-face with so many bloggers who I've followed quietly for years, including Peter from Souvlaki for the Soul, Barbara of winos and foodies, Jen from Jenius, Karen from Citrus and Candy, Sefie Eats and to meet other amazing bloggers was just inspiring!   The conference was capped with a lovely dinner at Kingsley Crab and Steakhouse with a menu set specially for the event.    Overall, a fabulous event that was a feast to all the senses!


Huge thanks and lots of love to the organisers of the Eat Drink Blog 2011 for their dedication and efforts!! Not only did this event expanded my network in the food blogging circle, the learning was just magnificent! Its just not enough to say THANK YOU! 

Now if you'll excuse me, I need to catch up on some serious tweeting.

Friday, November 04, 2011

Reply option to Blogger comments!


Thanks to Google and to Spice Up Your Blog for this new tip!   Been wondering about that feature but never got ten around to work on it.  Although I've had this space for some time now, I've never really sat down to actually learn the ropes.  But learning is a process and every day we learn something new.   Have a great weekend everyone!  And keep on learning!

Thursday, November 03, 2011

Blueberry mini cheesecakes for a baby shower (photos only)

 First post for the month, and its all just photos!  Made 30 mini cheesecakes and my Chicago Mini Cheesecake pan worked overtime!  These were for a friend who ordered it for an afternoon tea baby shower for her office colleague.  These were the photos she took from the day.  Aren't they just cute!  I took some of the left over cheesecakes  to work and everyone just drooled!  Who wouldn't, right?  Blueberry cheesecakes are all-time classics!


Thanks for the photos D!

LinkWithin

Related Posts Plugin for WordPress, Blogger...